
It's our final Creation Station blog hop for 2022, and we are going out in style! The holidays have so much crafty potential beyond cards that it makes my paper crafter heart sing. Our Holiday Happenings Blog Hop is sure to inspire a multitude of other projects for you to add to your December checklist this year. My project is this super fun advent calendar that I made with pretty pastels, Lindt chocolates, and the number stickers that are included in the Santa Express Memories & More Card Pack:


These little house are so sweet, I am thrilled with how they turned out! It definitely took some trial and error but I finally got the measurements perfected and I was an expert after making them 24 times! Each house is two parts: a box that holds the daily treat, and the front and back of the house attached with a roof.


You could definitely simplify this and have an open box with just one house die cut attached to the front, but I really wanted the look of a snowy village with a hidden surprise. In my opinion, the surprise is the key element of an advent calendar!
BASE:
Start with a piece of cardstock that is 3.25" x 7", and score on the short side at 1.75", and on the long side at 0.5", 2.25", 3.75", and 5.5". Burnish all the folds and then cut along the score lines as shown below.

Add some strong adhesive to three flaps, and fold it all up into a tidy, open top box. Set this aside, and create your roof. I used a variety of cardstocks in candy colours for my calendar, but you could go any scheme that suits your holiday décor or aesthetic. I made three houses in each in Daffodil Delight, Pale Papaya, Petal Pink, Blushing Bride, Calypso Coral, Soft Sea Foam, Mint Macaron, Pool Party, Bermuda Bay, Purple Posy (retired), Gorgeous Grape, and Smoky Slate.

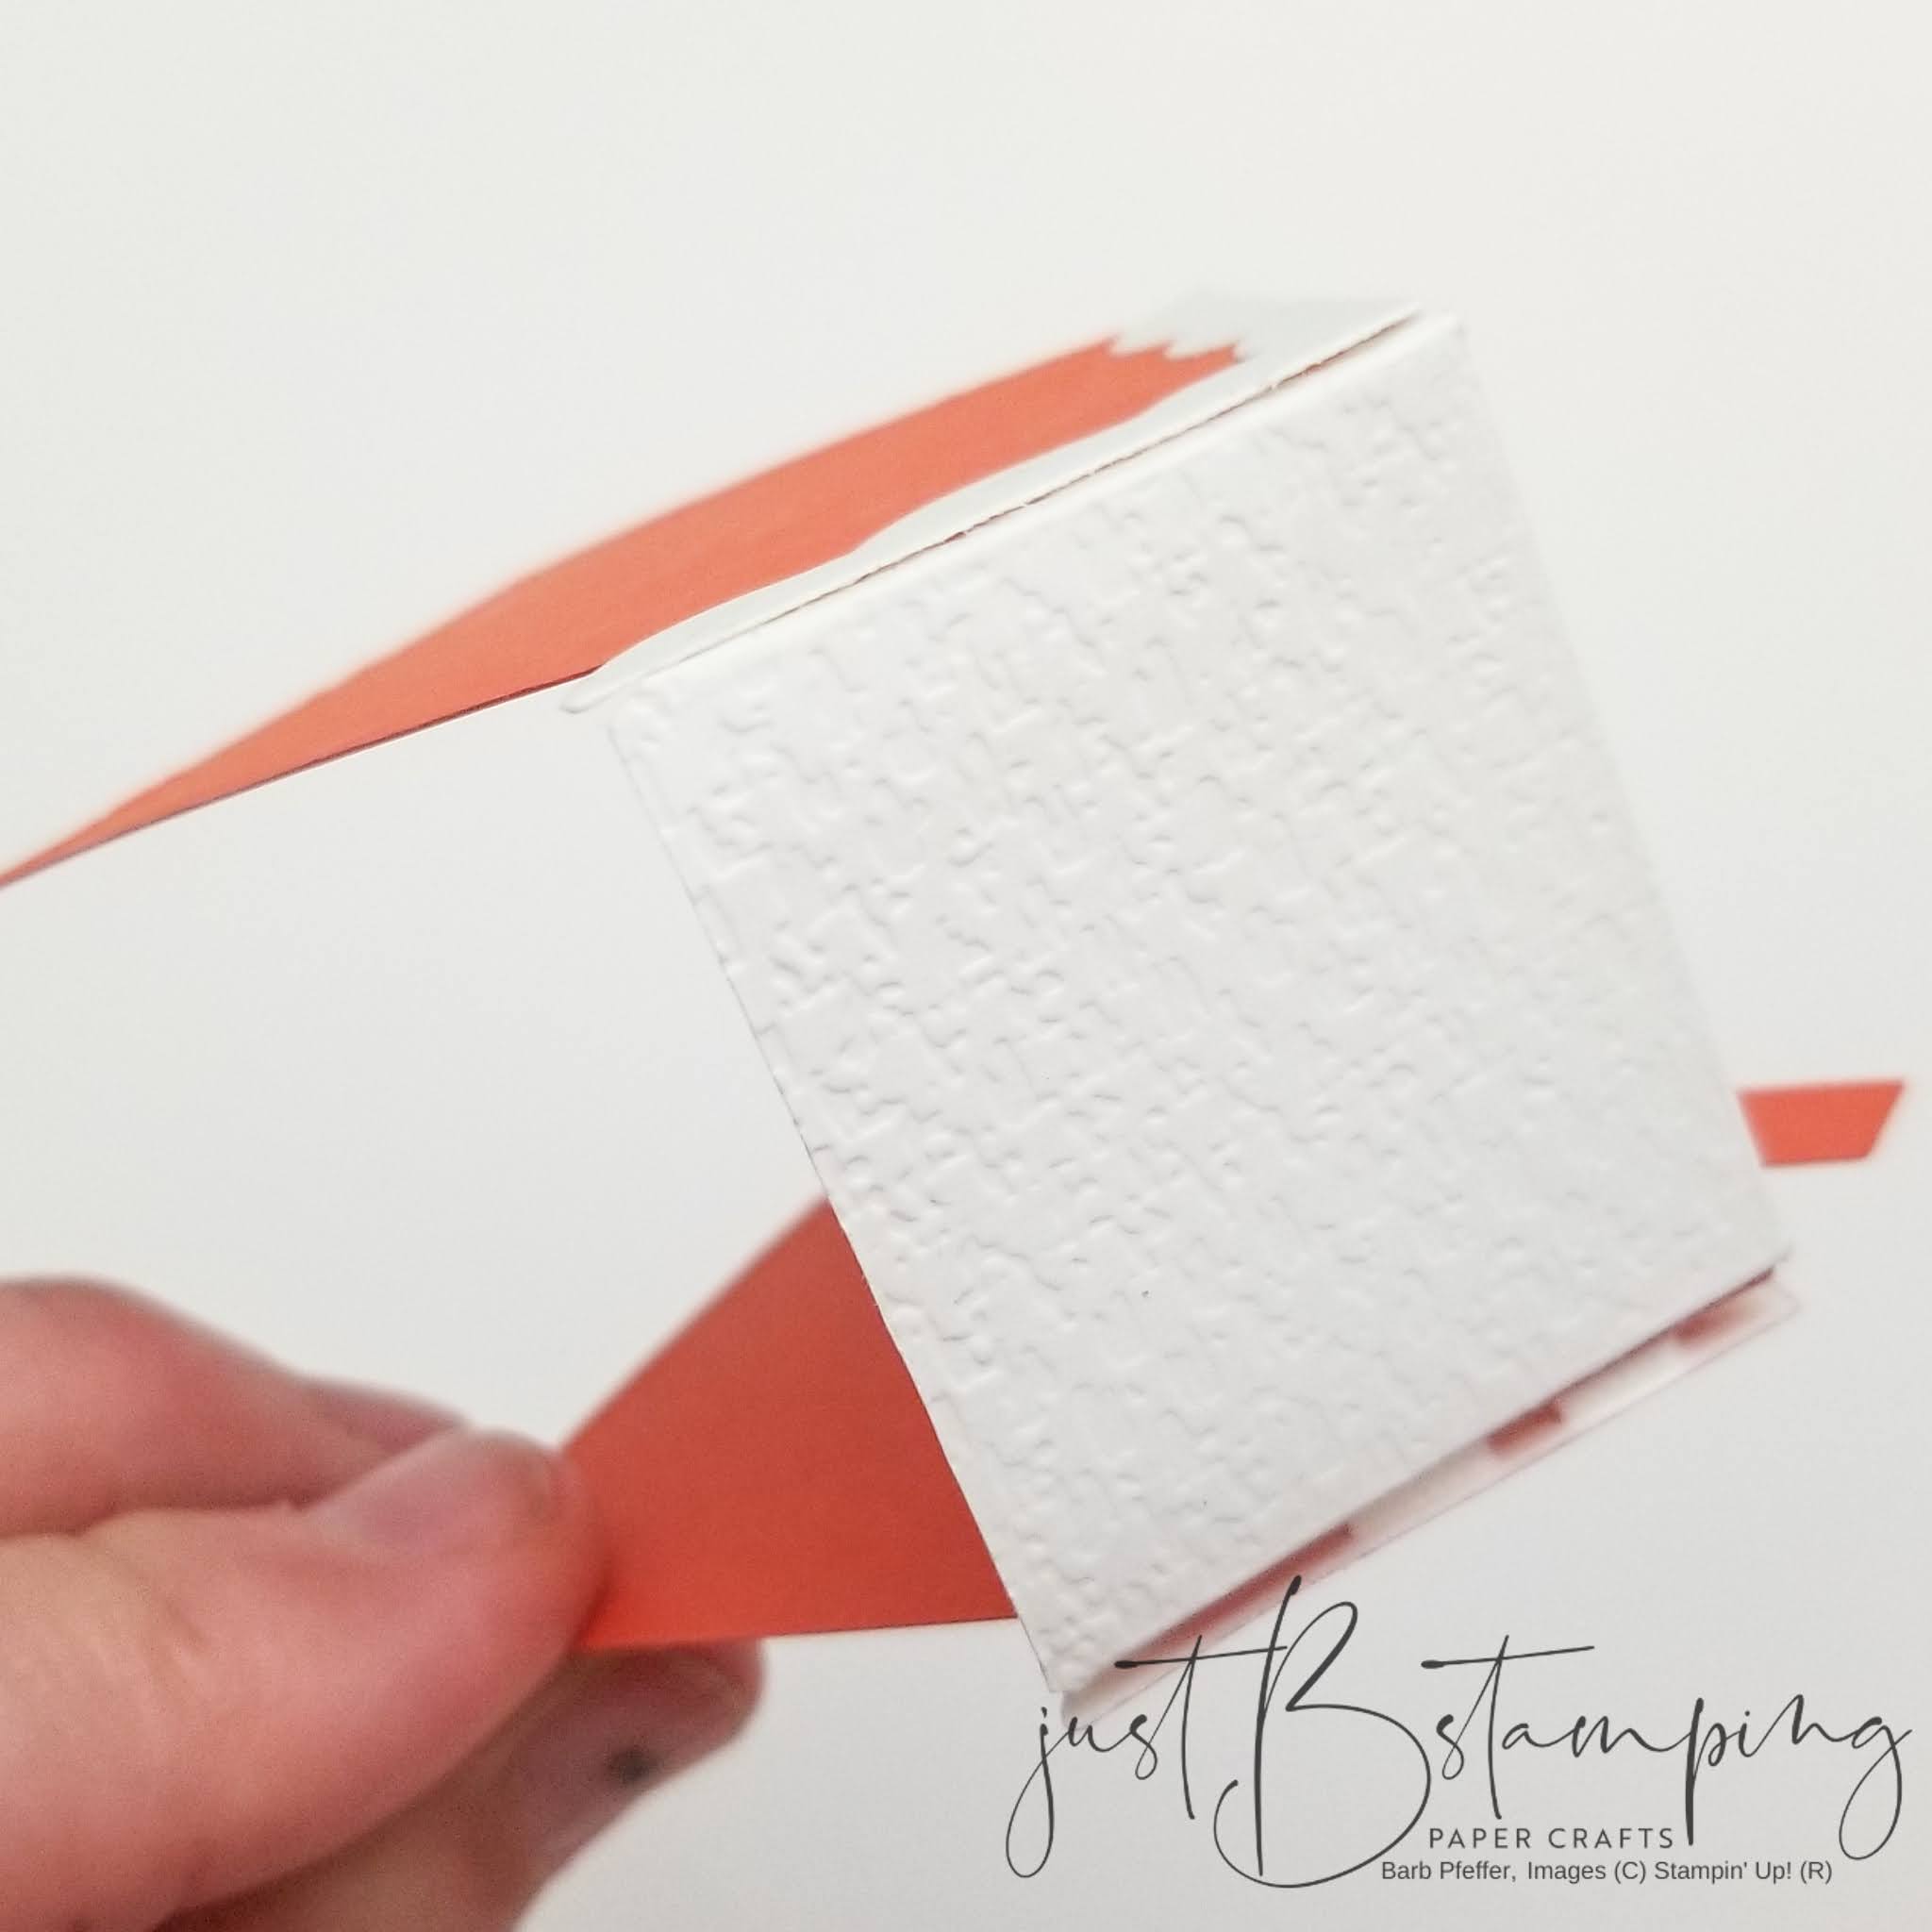
ROOF:
The fun part is the roof /house pull apart. I started with a piece of Basic White Cardstock cut to 2.75" x 2" and scored at .25" on each side of the short edge. I then scored it down the middle of the long edge, at 1-3/8". I then ran this piece through my Cut & Emboss Machine with the Timeworn Type 3D Embossing Folder. It's very subtle, but it adds so much life to this piece! Set this aside, and start working on your houses.
HOUSES:
I die cut two house shapes from a piece of coloured cardstock using the Gingerbread House Dies, and stamped some decorations from the Sweet Gingerbread Stamp Set on one house in Basic Grey Ink. I also stamped a door on a scrap of Basic White Cardstock, and then I die cut 2 scalloped roof pieces and two windows, to which I added some colour with my Pool Party Blends. For the front house I popped the door and scalloped roof up on Dimensionals, and added a Basic Rhinestone Jewel to the centre of the gingerbreading detail. Finally, I added my numbered square (again, found in the Santa Express Memories & More Card Pack) on a Dimensional right above the door, as though it is the street number. Too cute, right?!


For the back house I glued the scalloped roof flat to the die cut house shape...this is just there to help line up the 3D roof piece when we go to assemble the project. It feels like you don't need it--but trust me, it made a world of difference. ;)

ASSEMBLY:
Now that you have all of your pieces ready, you can assemble your 3D house! Start with the decorated house die cut and add some Tombow liquid glue to the back of the house across the top roof line. Then take your embossed and scored roof, and glue it to the house, following the line of the roof. Hold it for a minute while the glue adheres. Now take the plain house die cut and repeat the process: add liquid glue to the back of the house along the roof line, and glue the scored roof piece to the house; hold.
I promise, once you have done this a couple of times you will just fly through! I am impatient, so I actually glued the front house to the roof for all 24 of my houses, then went back to my first house and glued the back house onto each, so that I could move quickly and not worry about waiting for the glue to dry. If you want to assemble one house at a time, just be patient and really make sure the glue on the front house is solid before you try to glue the back house on.
I filled all of my little houses with a different flavour of Lindor chocolates...because isn't shopping the bulk bins at the Lindt store a holiday tradition all of its own? I stacked my houses in my tiered tray with some festive greenery, a little fake snow, and some sparkly lights, and I am all set to countdown to Christmas!
I would love to hear from you before you hop along to see what Yvonne has for you over at The Creative Teacup. Please leave me a comment and then click next up to continue on the hop.

Barb

Barb: This Christmas village is AWESOME! What a cute idea--and what a lot of care and attention to detail to make so many boxes. The effort was WELL worth it. These are brilliant!
ReplyDeleteThank you so much, I love how they turned out.
DeleteThese are just adorable. I love that they have a little enclosed roof on them and I love that you've made them into an Advent Calendar. Super cute!! xx
ReplyDelete