MENU

Showing posts with label Stampin Up. Show all posts

Sunday, 10 January 2021

Ice Cream Birthday

Is there anything more birthday than a stacked ice cream cone shaker card?!  I just LOVE the new Sweet Ice Cream stamp set, punch and paper.  And I couldn't resist making a shaker card with the coordinating sprinkles!!!  


I used a colour scheme of Bermuda Bay, Pacific Point and Granny Apple green for my inspiration.  That is once again the beautiful ombre paper from the free Saleabration collection--it comes in such yummy colours!  

I stamped the Happy Birthday sentiment from the stamp set in versamark ink on Bermuda Bay cardstock and then heat embossed it in white powder.  It's so great to have a large sentiment, as it allowed me to fussy cut it for a more free-form look.


I always create my shaker window as a separate piece from the card base, so that I can ensure it is sealed up tight.  I used the largest rectangle from the Stitched So Sweetly dies and created my own window by cutting out the inside of the rectangle with square dies (just run the square die through your cutting machine multiple times, moving its position until you get the opening you want).


I added a piece of the DSP to the back of the window...those little sprinkles are so fun!  And I filled my shaker with a combination of the sprinkles from the suite, sequins, and small metallic beads so that is makes a great sound when shaken up.

I stamped the ice cream scoop in my three colours and stacked them on top of a Cinnamon Cider/Soft Suede ice cream cone, all of which were punched out with the coordinating punch.  I then used glue dots to add a few of the sprinkles to the top of my cone, because every cone needs sprinkles!


And for a finishing touch I added some of the new Whisper White twine tied in a sweet little bow.  

For the inside of my card I added another single-scoop cone and the sentiment "with sprinkles on top."


This card works for men, women, kids--everyone!

I'll be featuring this suite all week on my Instagram (@justbstamping) and Facebook pages (justBstamping) so I hope you'll join me there to see all my ideas.

Also, in case you missed it last week, I announced a few ongoing events too:

- Freebie Friday; every Friday I'll choose a random winner from everyone who commented on my social media pages and send them a card as a thank you

- Surprise Saturday; every Saturday at 2pm we will meet for this free event where you will assemble a mystery card using your supplies and my design.  RSVP to receive the link to the event and the list of supplies/measurements to gather ahead of time.  

I hope you'll consider playing along, crafting is so much more fun when it is shared with others!


Sunday, 3 January 2021

Wild Roses Birthday Card

The new Jan - June mini catalogue goes live tomorrow!  If you don't have a catalogue yet please let me know and we can organize free porch pickup--there is so much to see!!

As a demonstrator I've had the chance to preorder items and have been having TONS of fun making new projects to share with you.  If you don't already, please follow me on Instagram (@justbstamping) or Facebook to see all the latest!  :)

This week I am kicking things off with the oh-so-beautiful background stamp, Wild Roses.  This stamp gives an amazing look on plain cardstock, but I stamped it on a sheet of the new Oh Some Ombre DSP (saleabration freebie!!) and it just amps it up a whole other notch!

I used a tone-on-tone technique with Roccocco Rose ink on Roccocco Rose Ombre paper, trimmed to 4.25" x 5.50".  I used the Stitched Nested Labels die to cut out a window on the front of my card--did you notice the stitching on the OUTSIDE of the window?!  Love that added feature.

I popped up my card front on dimensionals and added a recessed "Happy Birthday" sentiment from the new Oval Occassions stamp set.  I have used this stamp A LOT this week, I love the mix of fonts and it's just the perfect size to fit in so many places.

I die cut some pretty little flowers from the Wreath Builder die set in Very Vanilla and Blushing Bride, and some leaves in Soft Sea Foam, and placed them around my sentiment window.  I added some coloured pearls to the centers, which just adds to the softness and femininity of this card.

And I finished off the front with some new Whisper White twine tied into a bow.  This twine comes in a two-pack with Blushing Bride and it is FABULOUS!  Sometimes twine is too thick to do much with but this is the perfect thickness to tie a bow without any bulk, and is so soft and easy to use.

For the inside of my card I took the die cut piece from making my window, cut it in half, and used it to decorate the top left and bottom right of my inside panel.  Nothing goes to waste here!

I'll be posting more projects all week featuring this beautiful background stamp, so please be sure to check out my Instagram and Facebook pages.  

I appreciate you stopping by and would love to hear your comments,

Barb

Saturday, 15 February 2020

Stamping Symphony Blog Hop--Painted Poppies

Time for another Blog Hop with the ladies from Stamping Symphony!

We are still showcasing all the lovely new products in the mini and Saleabration catalogues--there is so much great stuff to while-away these wintry days!  I'm featuring the Painted Poppies suite this time around.


I thought the Painted Poppies DSP was the most eye-catching part of the whole suite and actually considered purchasing just the paper--I'm so glad I didn't!  I knew that I would be seeing tons of inspiring projects once the catalogue went live and would want more, and I was right.  ;)  I did limit myself to one of the two (yes, two!) coordinating bundles as a compromise to my wallet and those stamps and dies have revived my love of watercolouring.


I was inspired by this card from the very talented Tammy White at https://stampspaperscissors.com/--so much texture, and so much to see!  I improvised my version based on the supplies that I had and squaring up those layers (I love the look of off-centred layers but my OCD-heart just can't do it!).  I rearranged the layout as well, just to mix it up.

Peaceful Poppies Elements - Forever Blossoms by Tammy C. Wilson

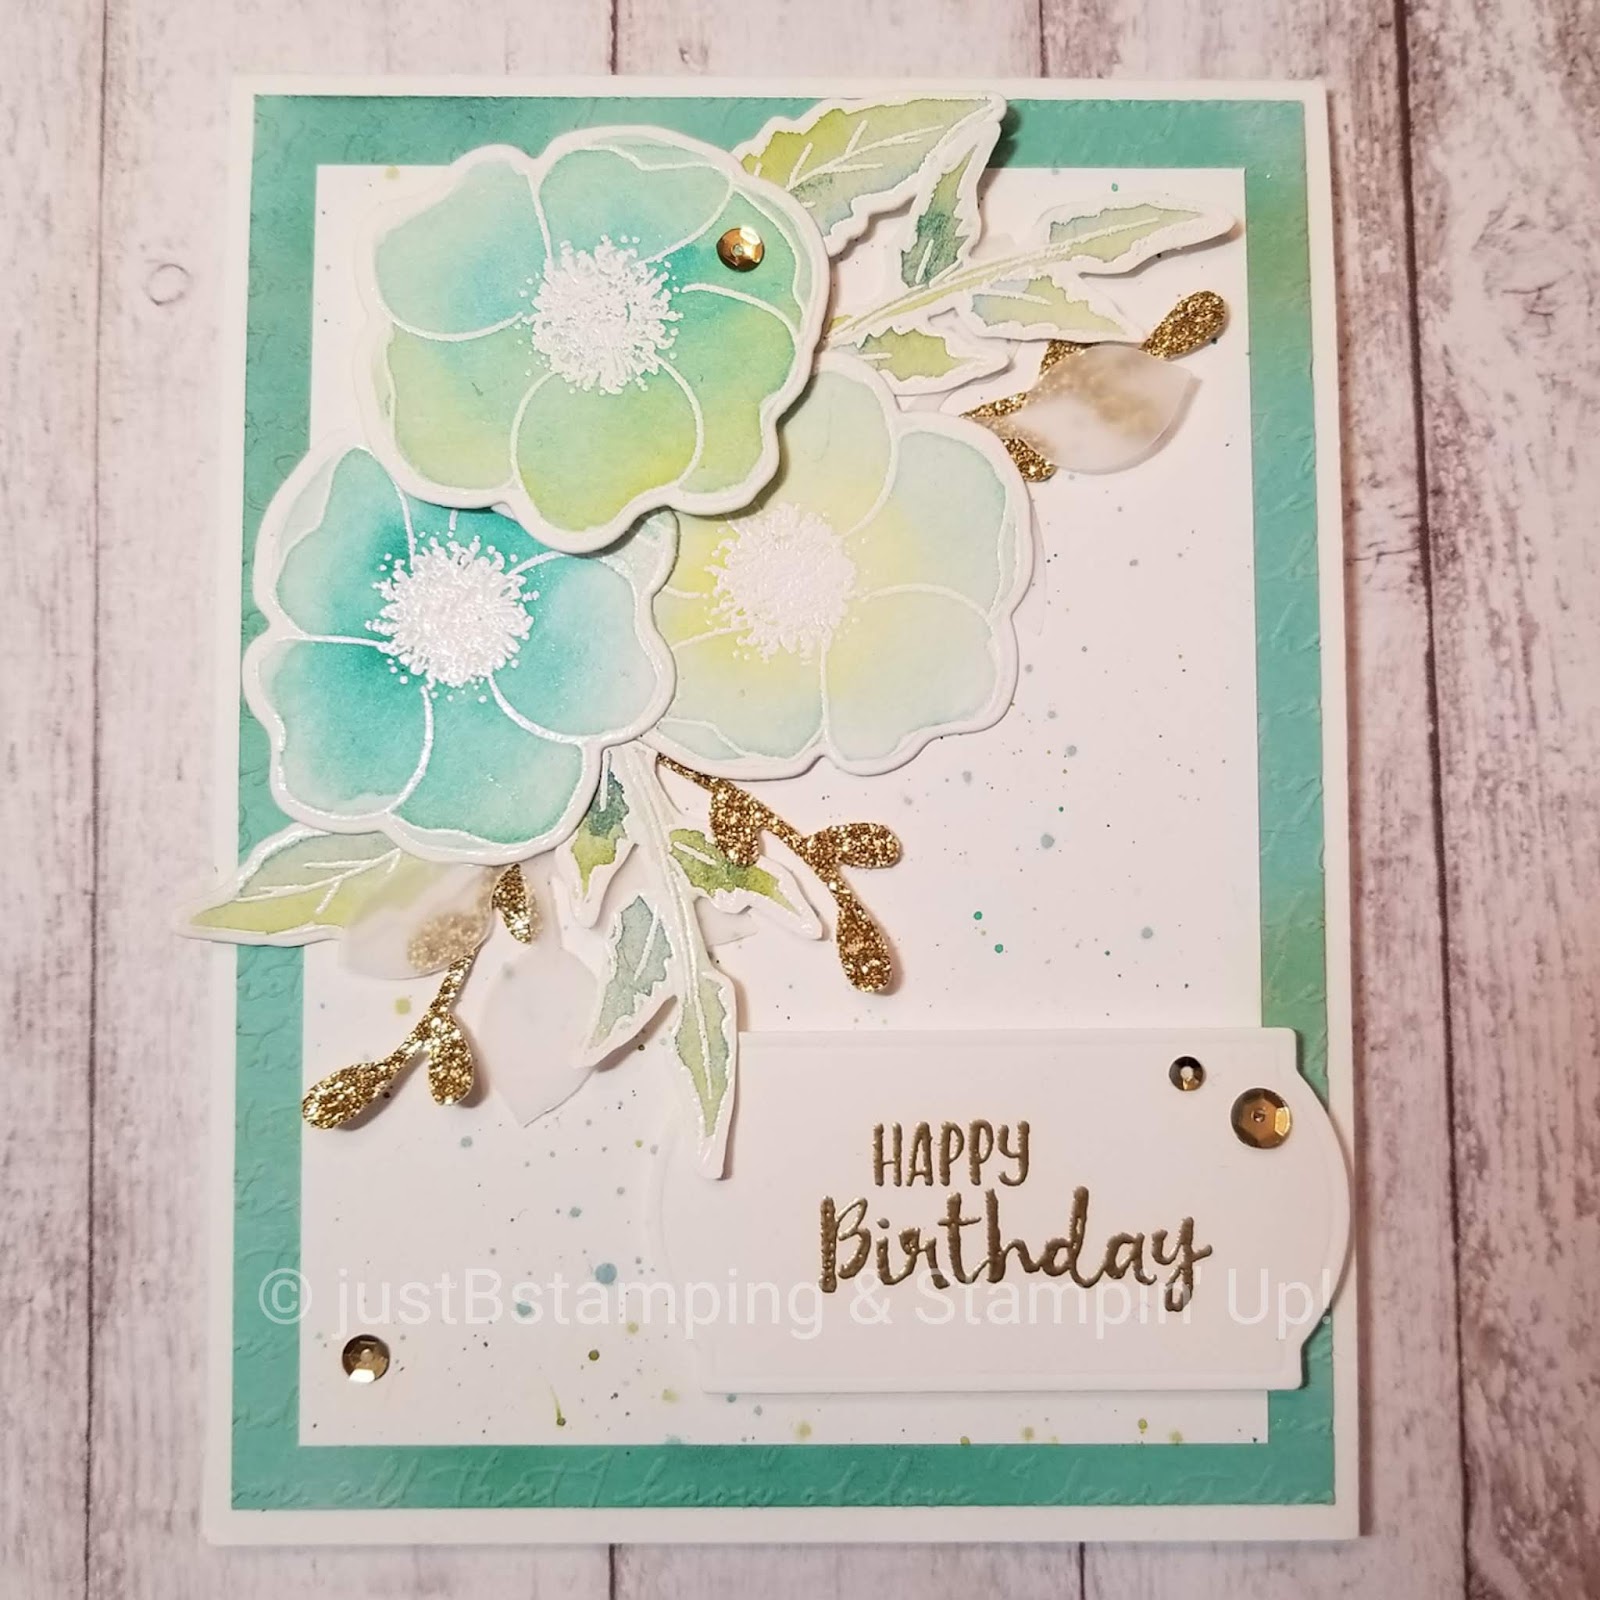
For my embossed background I started with a layer of Coastal Cabana cardstock and sponged various splotches of Pretty Peacock and Bermuda Bay ink randomly on the paper.  I then ran it through my Big Shot with the Scripty 3D Embossing Folder.  It's hard to catch on camera but you can see a few spots peeking out.


On the next layer I splattered ink from my aqua painter in Old Olive, Bermuda Bay and Pretty Peacock onto white cardstock.  One of my goals for 2020 is to get better at splatter, so you should be seeing lots of that from me in the coming months!


I love, love, love white-on-white embossing these days....it may need to be a Techniques class soon!  I embossed the flowers and leaves in white on watercolour paper and started playing.  I watercoloured two poppies in Coastal Cabana and Bermuda Bay, with Daffodil Delight mixed in places, and one poppy with Bermuda Bay and Pretty Peacock inks.  I also watercoloured various leaves from the set with Old Olive and Pretty Peacock.  Everything was dried and then fussy cut or cut with the coordinating die sets.


I added the same hints of gold glimmer paper and vellum as in Tammy's card, and a few sequins left over from a Paper Pumpkin kit.


I heat embossed my sentiment in gold on one of the labels that comes in the bundle and popped it and one flower up on dimensionals.  I tried to keep in mind the thickness, as all that layering on its own added some depth to the focus point, and I still want to be able to mail the card.


I love to be inspired by the works of other crafters--whether casing an exact card or challenging myself to mix it up and make it my own.


Do you have a favourite crafter I should check out?  Shout out in the comments if you do!

And here are the links to the other bloggers this month:


JustBStamping (Barb--you're here!)

Stay warm,
Barb


Wednesday, 15 January 2020

Salebration and a Blog Hop!

Salebration has started once again and, as always, it does not disappoint!  My absolute favourite this year is the beautiful Happy Birthday To You stamp set, with this gorgeous floral cake.  And the best part is--you can earn it for FREE!


 I've embossed the image in white and then watercoloured the flowers in Rococo Rose with Old Olive leaves.  The cake itself is Mint Macaron.  I cut the image out with the coordinating dies--available in February to customers but available now to demonstrators...just one more reason to join my team ;)


It's hard to photograph but I've layered the cake with dimensionals onto a white panel embossed with the 3D Scripty folder, and mounted that onto a piece of mint cardstock.  I've wrapped some new Whisper White Wrinkled Seam Binding ribbon as well, and tied a pretty bow.


Have you noticed that AMAZING stitched scallop rectangle yet?!?!  Those dies were the first on my list.  You get 10 dies total including 6 layering rectangles and 4 shapes--all perfect for sentiments.  "Celebrate every moment" is from the new Honey Bee stamp set and is stamped in Old Olive ink.


Inside my card I stamped a mint cake and added "happy birthday" in Old Olive.

I've also made a great anniversary or wedding card with this cake, can't wait to share that with you soon!

Please keep hopping to the next in our lineup to see everyone else's creations, and comment below.


JustBStamping (Barb--you're here!)