
I love to put lots of layers on my cards--I think that's part of what makes handmade so special. So I knew I would enjoy this month's Stampin' Friends hop theme, and I took up the challenge with a seven-layer card and matching gift box!


Thanks for stopping by today, you may be joining me from Teri Pocock's blog, where you saw another wonderful project for inspiration! If you get lost along the way there is a full list of blogs at the end of this post so you can catch everyone's projects.

I wanted a finished size of 4.25" x 5.5", so I cut my shadow box base to 6.25" x 8.5", and scored on all four sides at 0.25" and 0.5". I then die cut the window out of the centre of the base using the Stitched Rectangles Dies, which as a bonus left a pretty stitched border on the shadow box too. Tip: save the die cut piece to decorate the inside of your card!
To build my scene I started by inking a cloudy blue sky with Soft Sky Ink and my Blending Brush, as well as some grass with Granny Apple Green Ink, on a piece of Basic White Cardstock cut to 4.25" x 5.5". Then on to the fun part! I fussy cut mountains, trees and animals from the Happy Forest Friends DSP, and started creating my layers. The mountains are glued flat to the cardstock panel, along with one tree, while the two other trees in my background are popped up on dimensionals. The owl and tree stump are layered on top of the popped up trees, which makes layer 3 for those keeping track. :)
.jpg)
When I was happy with the inside scene I folded the scored edges of my shadow box piece around to form the box, and then adhered it on all sides to the back of my base panel. Tip: work one side at a time to ensure you are keeping the angles square, and use Tear & Tape Adhesive for a strong bond.
Then I decorated the outside of my shadow box. I die cut some hills with the Basic Border Dies in Sahara Sand Cardstock and glued them flat to the bottom front of the box (layer 4). I added another fussy cut tree and flowers on dimensionals (layer 5), and then added my fussy cut bear and birds on top with more dimensionals (layer 6).
.jpg)
To fill in the empty space at the top of my scene I die cut three clouds from the Give It A Whirl Dies--they are also stitched so you would never know they were from a different set! Two clouds are glue to each other and then attached to the top corner with dimensionals. I stamped "hello, baby" from the Happier Than Happy Stamp Set on a third cloud and added it on top of the first two clouds with dimensionals, and then also added three die cut hearts from that same set in Calypso Coral, Flirty Flamingo and Blushing Bride on dimensionals (layer 7). And aren't the Rhinestone Basic Jewels in the centres of each of the hearts too sweet?!

I glued the entire shadow box to a regular card base (5.5" x 8.5", scored at 4.25") made from Thick Basic White Cardstock. The thick cardstock is strong enough to support the card front and ensure it stays standing.

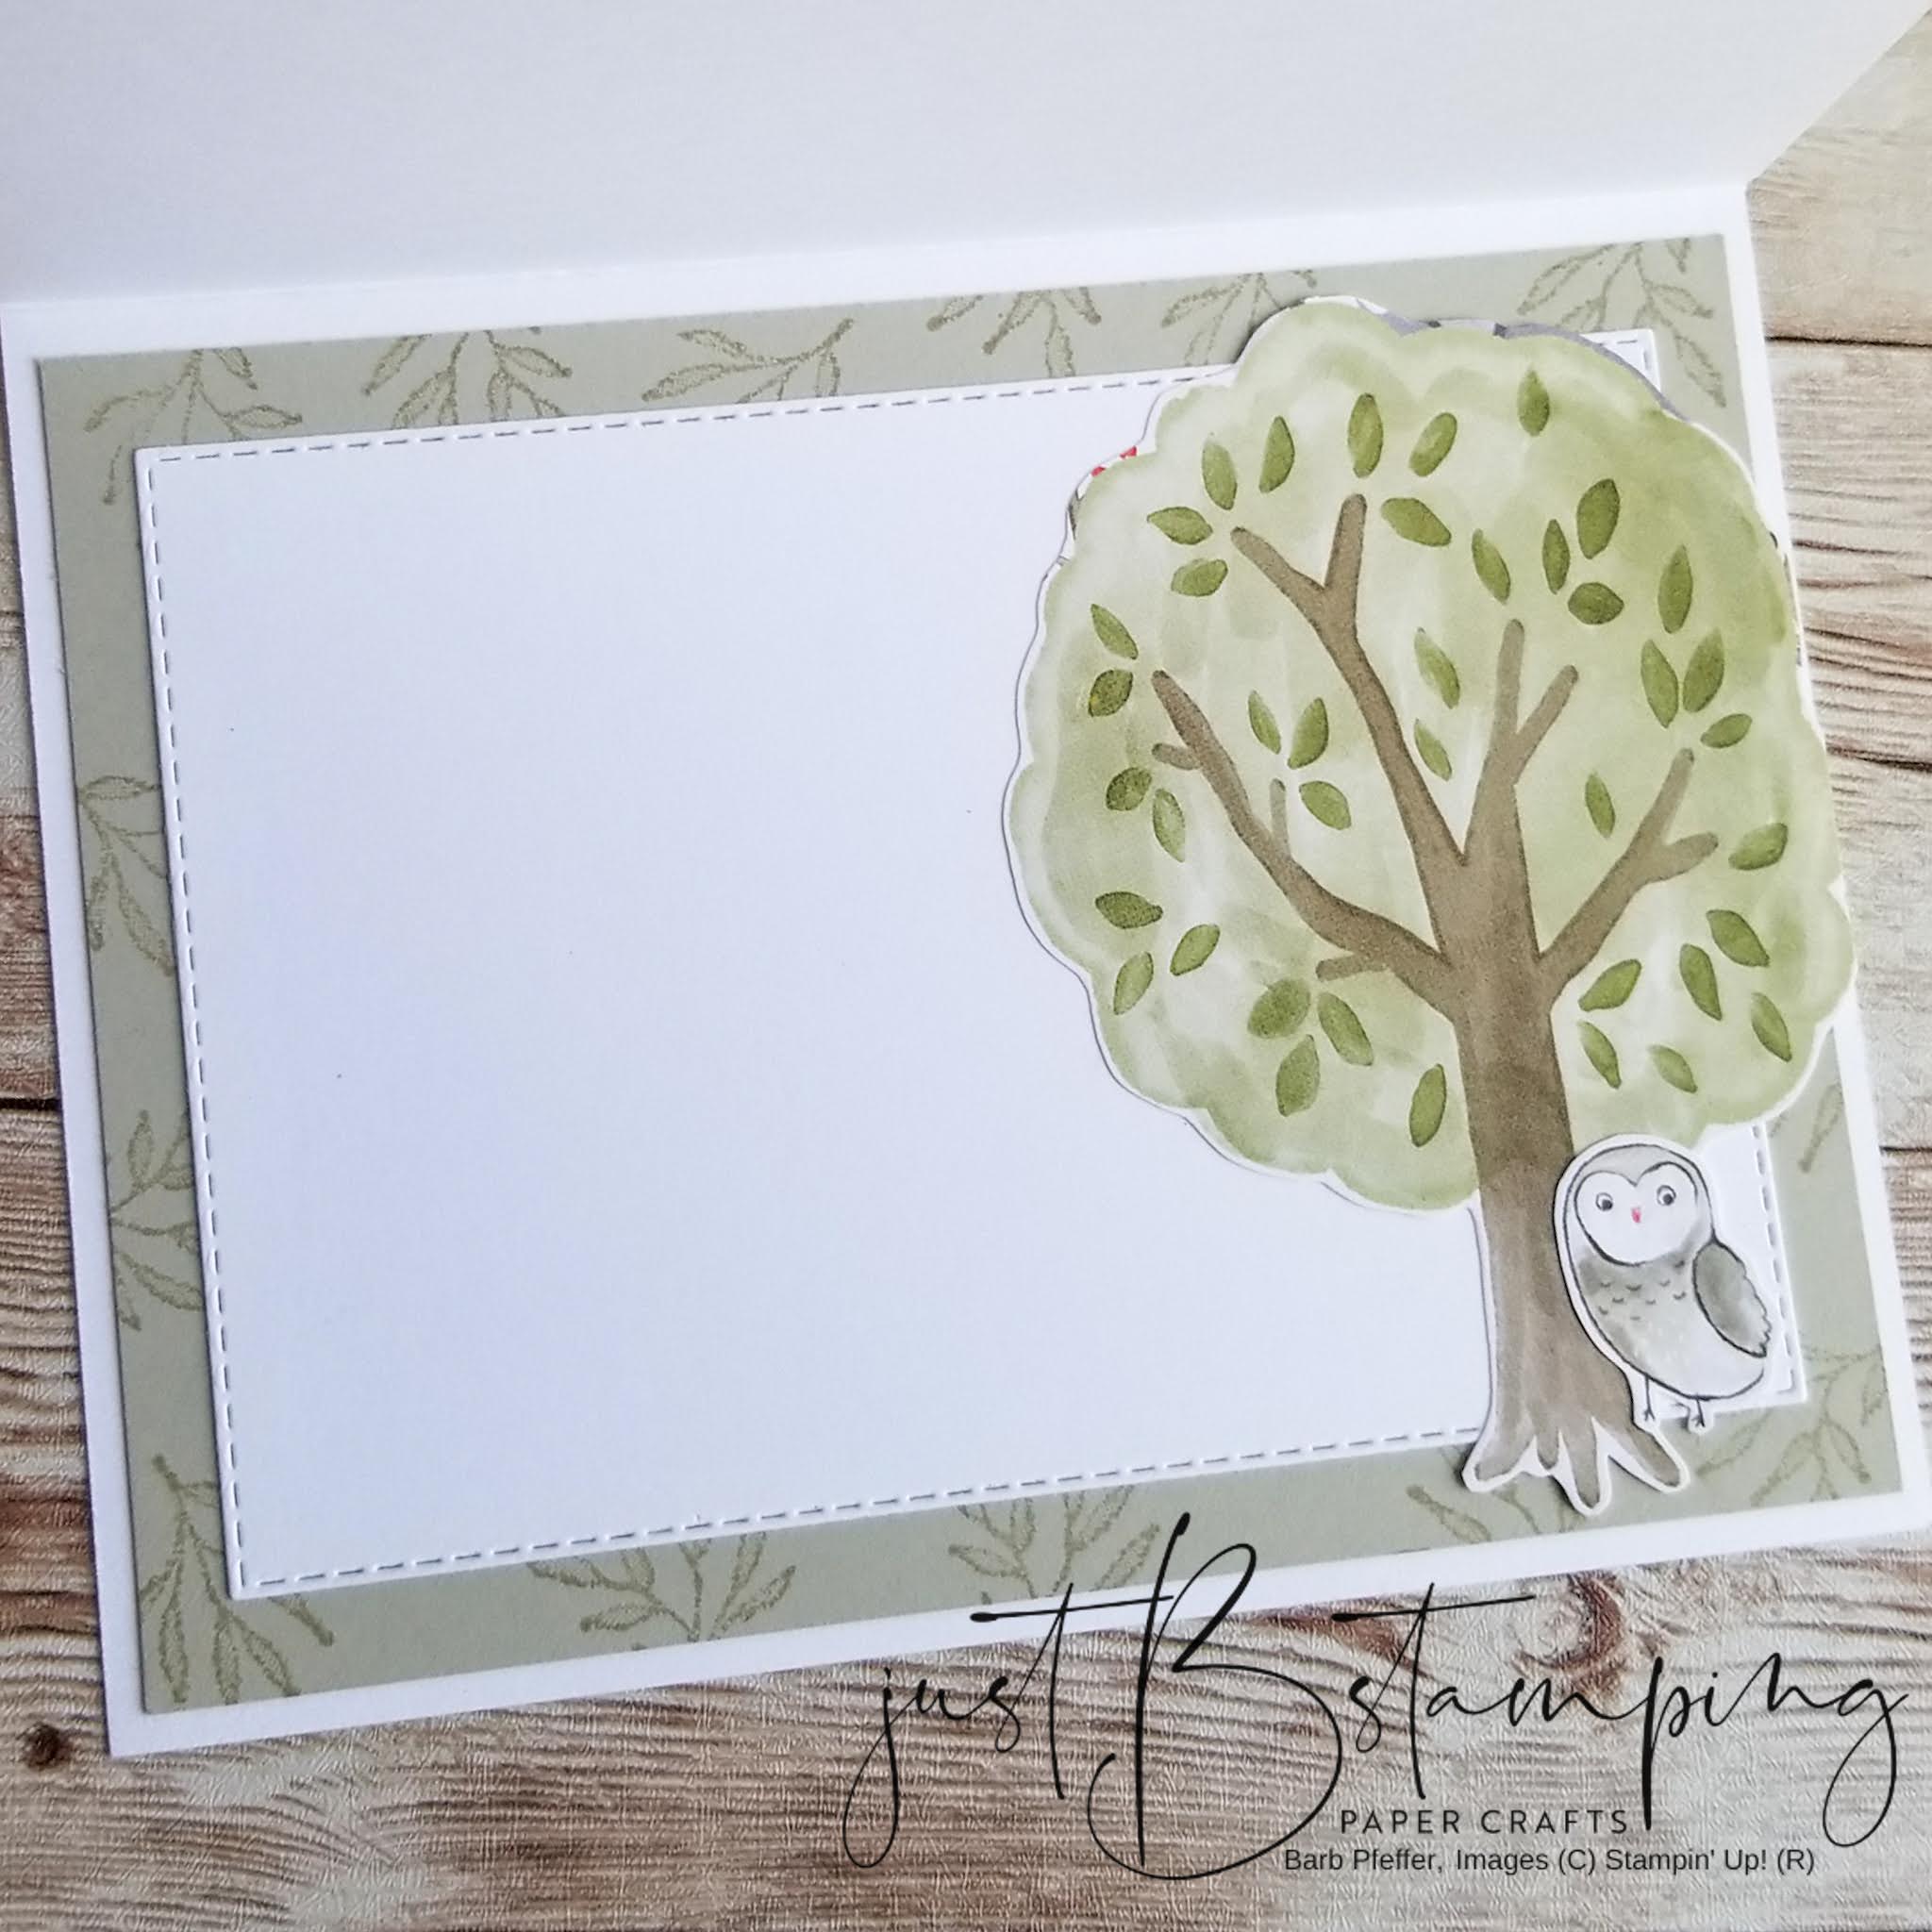
I decorated the inside of my card with a piece of Sahara Sand Cardstock cut to 4" x 5.25" and stamped with a floral image from the Happier Than Happy Stamp Set in Sahara Sand Ink. Then I added the stitched rectangle piece that had been die cut when creating the shadow box--nothing gets wasted here! And another tree and owl fussy cut from the Happy Forest Friends DSP.
Whew, that was a labour of love! So I decided to stay very simple with the coordinating gift box to show that you can create beautiful, quick projects with this suite too. The Scalloped Kraft Treat Boxes do all the work here, with pretty gold foil dots really dressing up the box. I added a simple belly band made from a piece of Happy Forest Friends DSP, with an added layer of Natural Finish Ribbon. This ribbon is soooo soft! I also wrapped some of the 2022-2024 In Colour Baker's Twine in Sweet Sorbet.


I hope you enjoyed my projects today, and are inspired to make something special for yourself! I would love to hear from you in the comments below before you hop along to the rest of the projects.
Barb

This is amazing - I just love that diorama card.
ReplyDeleteJust beautiful! Such a sweet stamp set!
ReplyDeleteSooooooo adorable! Love what you created, tfs
ReplyDeleteThis is the cutest card I’ve seen! It so adorable
ReplyDeleteI can’t wait to play with this set and try this
Barb, that diorama card is over the top in cuteness! A labor of love for sure!
ReplyDeleteLove the shadow box card...this set/dsp is on my list but I think it just got moved up a notch or two!
ReplyDeleteHave the dies but not the paper. Will try this one Really cute
ReplyDelete