
How is it possibly the middle of August already?! The summer is flying by and but since it has been a hot and sticky one I've been enjoying the AC in my craft studio this week making holiday cards. I love to use fun folds in my projects, and created this Gnome card for you today:
We made a non-holiday version of this fun fold slider card at my July Card Class and it makes for a real wow. The trick is getting the windows all lined up in the same place, but I have laid out all of the steps for you!

Let's start with creating our card base pieces first--you need 3 different pieces for this fun fold:
- 4.25" x 8.5", scored at 4.25" (middle)
- 4.25" x 8.25", scored at 2.75" (front)
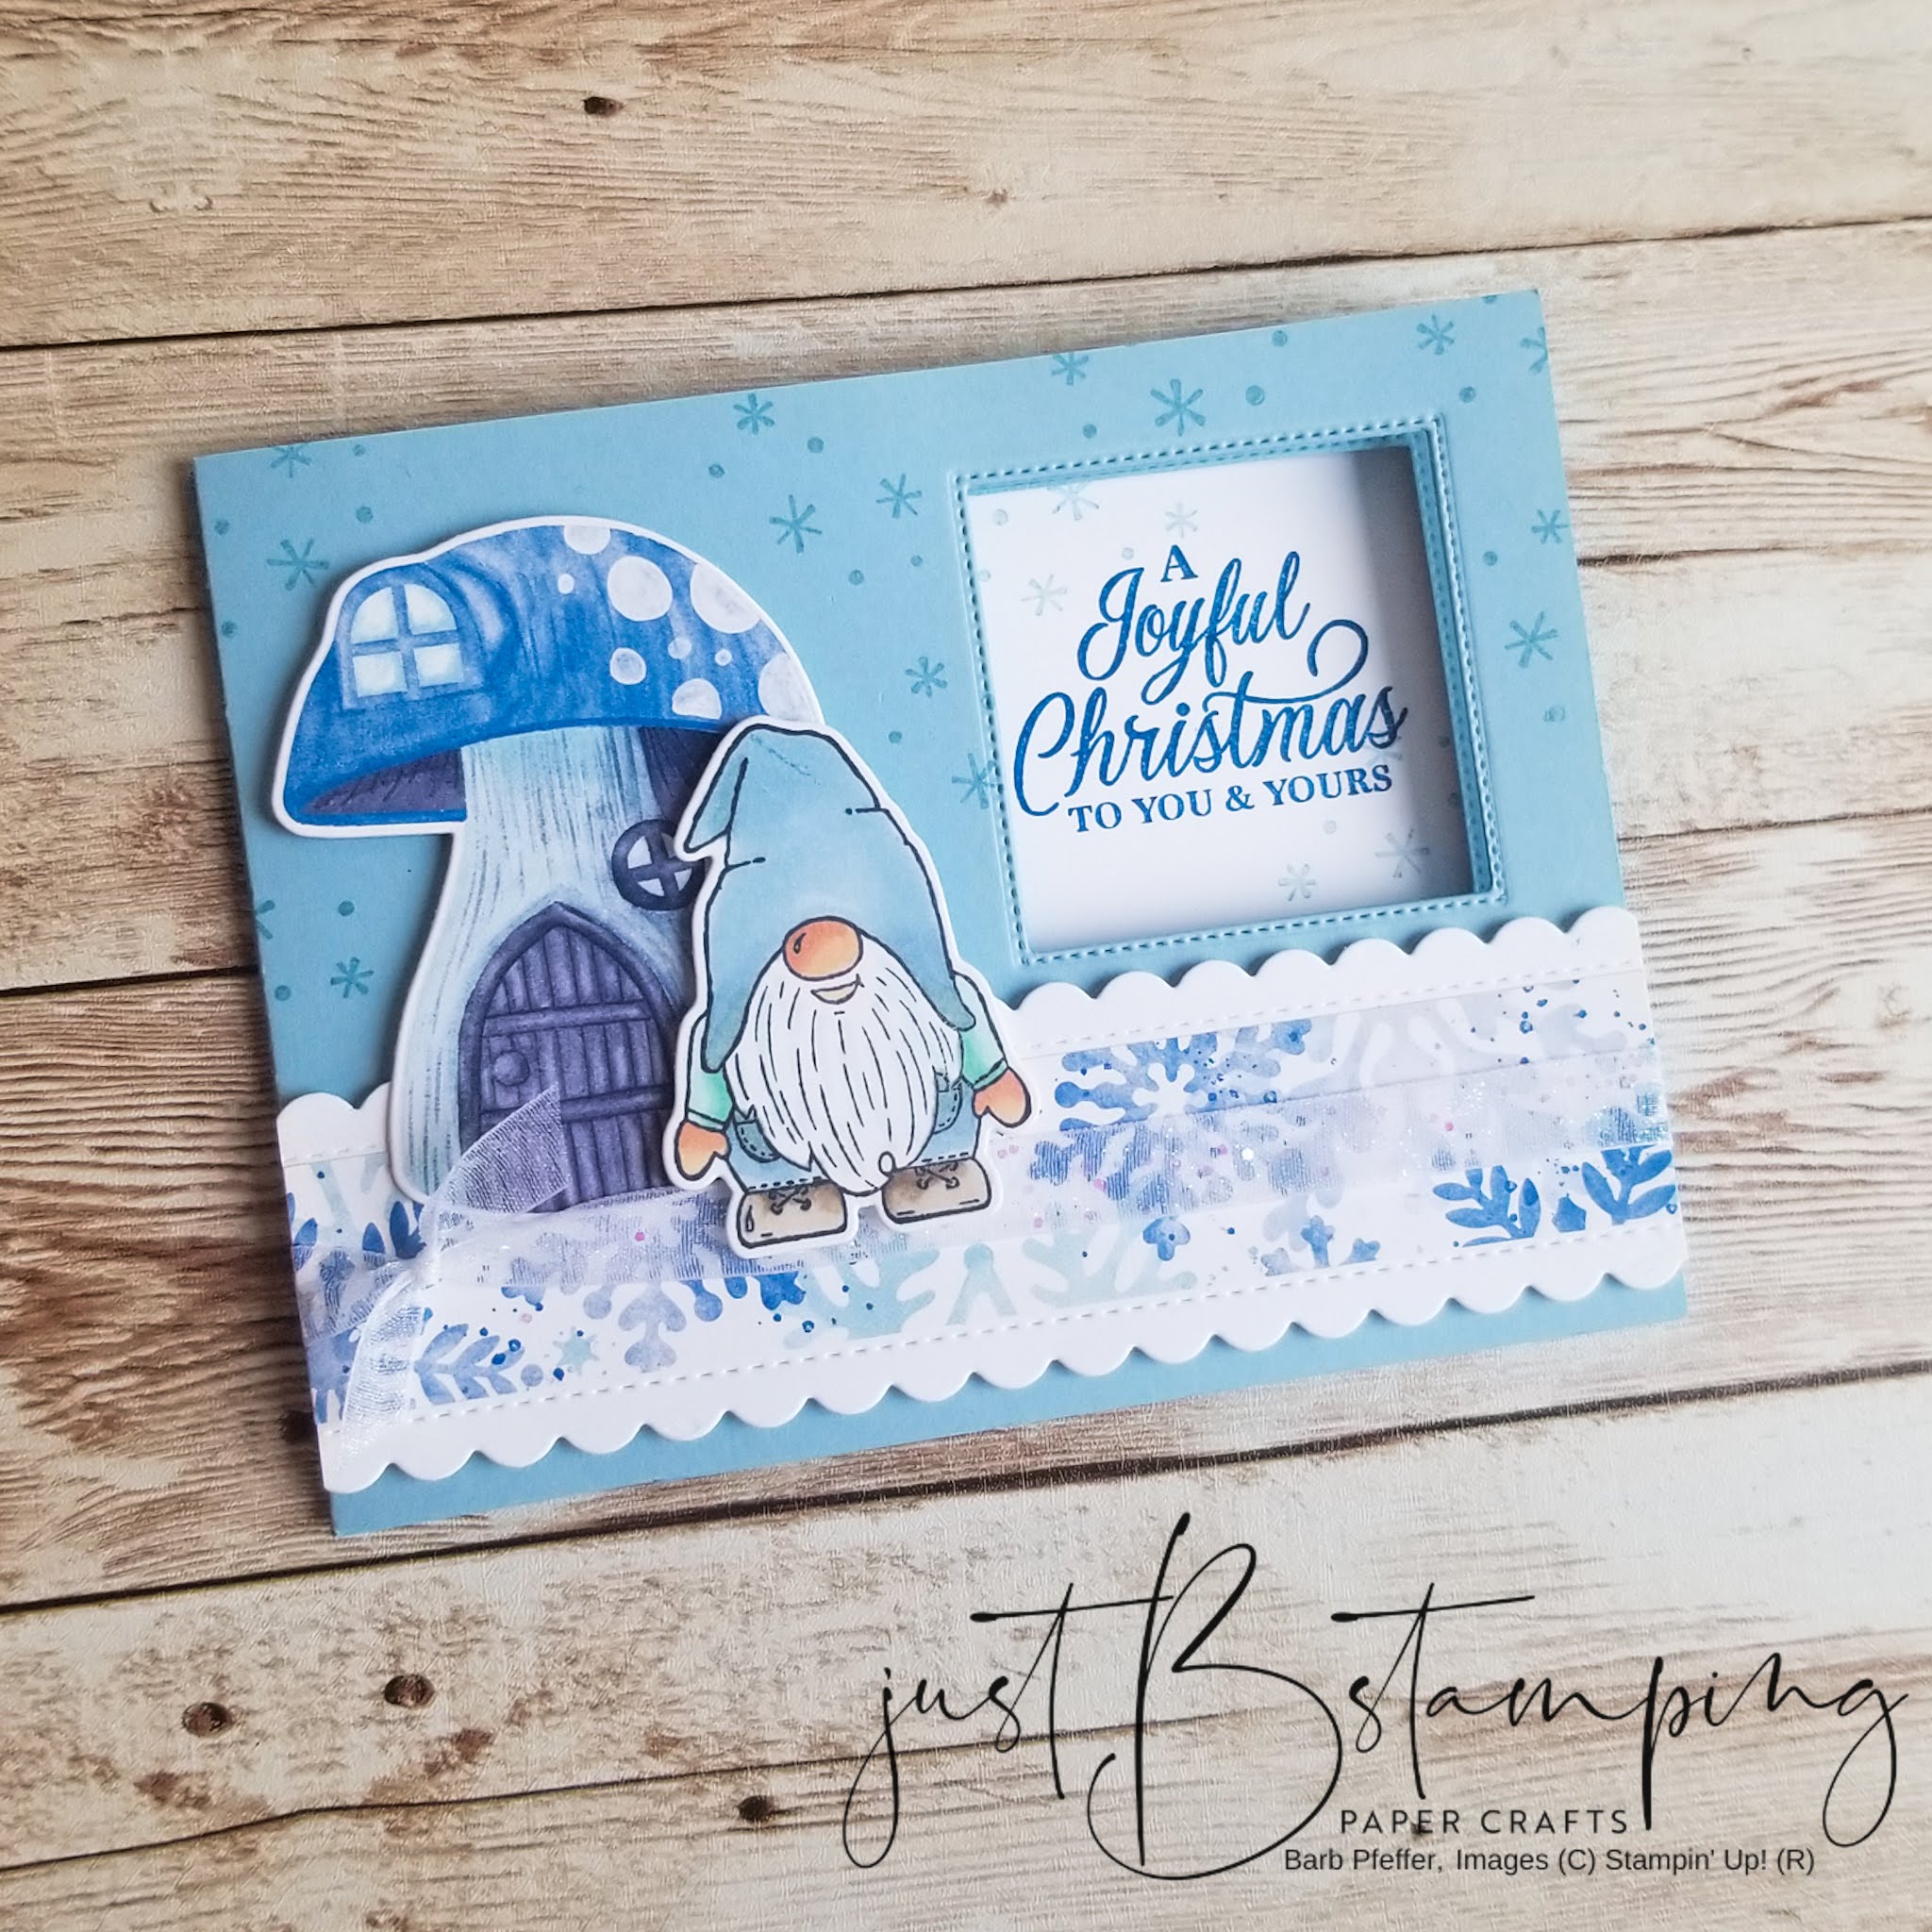
The first step in making this card it to die cut or punch out the window opening. I used the 3rd largest piereced square die from the Stylish Shapes Dies set for all of my windows. I started with the front panel and lined up the die in the top right corner, equal distance from the top and right side, and ran it through my Stampin' Cut & Emboss Machine. This piece then becomes your guide for all the other windows.
Now take your middle card piece, with the fold on the left, and line it up with the right edge of the front piece. I used some low tack tape to temporarily keep the two bases lined up and ensure nothing shifted, and then opened the middle layer so that it was no longer doubled-up. Place the die back in the cut-out window...it will basically snap back into place when you have it lined up correctly. Now run the whole thing through your Cut & Emboss Machine, and it will cut a window through the front of the middle base.
Remove the tape and separate the layers again. Take the middle base and close it, so it is now a 4.25" square again. Place the die back in the window and run it through your machine one more time, cutting a window out of the back layer that is perfectly in line with the front window.
Now it is time for assembly! Add Tombow Adhesive to the front of the middle card base (with the fold on the left and the window in the top right corner), and lay the front base on top. Using liquid glue for assembly gives you some wiggle time to ensure that your edges and windows are all lined up nicely.
The back card base has a 0.25" flap that needs to be on the front of the right side of the base. Add Tombow Adhesive to the flap, and glue it to the back of the middle card base, lining up the edges of the card on all sides. Here's a top-down view of what the base looks like when assembled:

Now it's time to decorate! I started by stamping some snowflakes from the Penguin Place Stamp Set in Balmy Blue Ink randomly across the top of my card front. I added a piece of 1.5" Basic White Cardstock with the top and bottom edges die cut with a scalloped border die from the Penned Flowers Dies. In the centre I added a strip of paper from the Storybook Gnomes DSP and a piece of White Glittered Organdy Ribbon tied with a knot at the left edge.
My mushroom house is die cut from the Storybook Gnomes DSP using the Gnomes Dies, but my gnome is stamped using the Kindest Gnomes Stamp Set and coloured with Blends in Balmy Blue, Pool Party, Crumb Cake, and some of the neutrals. He's die cut with the matching die from the Gnomes Dies too.

The inside of my card is decorated with more snowflakes and another gnome. I added a piece of Basic White Cardstock, embossed with the snowflake Wintry 3D Embossing Folders, to the back flap of the front base. This then slides into the window when the card is opened--which is just too cool!


Our Blog Hop is also an Instahop on Instagram! You can either keep hopping by clicking the links below, or you can head over to my Instagram page @justBstamping and join in on the fun there. Either way, if you have a chance to leave me a comment before moving on I'd love to hear from you!

Barb

No comments :
Post a Comment