MENU

Tuesday, 15 September 2020

Happy Holidays Blog Hop

 The fall weather has definitely arrived!  I love the crisp mornings and emerging colours, but it sure seems like Labour Day came and a switch was flipped this year.  It will be Christmas before we know it, so this month we are showcasing holiday cards with product from the new August-December mini catalogue.

One of my favourites is the Poinsettia Place Suite.  It has everything you need to make beautiful cards--stamps, dies, paper, embellishments, ribbon AND specialty paper.  My card is a fun fold that showcases all that pretty paper, and would be great for using up every last scrap!


This is a tri-fold shutter card and is the easiest fun fold you'll ever make--it's really all about the mountain/valley folds.  Start with a 5.5" x 12" piece of cardstock and score it at 2", 4", 8", and 10".  Give the paper a quarter turn and use a craft knife to cut a line between the first and last score lines at 1.5" at the top and bottom.  You can see the full tutorial that I followed at Splitcoaststampers.

From there it's just a matter of alternating folding some score lines (valleys) and out (mountains). The truly easy great part of this fun fold is that you end up with sections for DSP that are consistent in size, so you just cut strips of paper to fit and don't waste anything!

I used Crumb Cake ink to stamp my poinsettias, and added soft Sahara Sand shading.  The leaves are Old Olive with Sea Foam Green shading.  I could have highlighted the centres of the flowers with the Beaded Pearl embellishments included in the suite-it doesn't get more elegant than those--but instead I made my own with a combination of Basic and Metallic Pearls.


I used the same stitched die for the "inside" of my card to create a space for a personalized message, and added some soft stamping as embellishment.


I love the shading for this stamp set...they are separate pieces so you can use them or not, and they are almost like a watercolour, not intended to completely fill the stamped outline.


Continue the hop to see the other Christmas cards in our collection this month!


Saturday, 15 August 2020

August-December Mini Blog Hop

 We have another catalogue--already!  This one is chocked full of fall and winter images, paper and embellishments.  I'm not quite ready to dive wholly into Christmas for real, but fall is my favourite time of the year, so I decided to focus on the beautiful new Plaid Tidings DSP and the Stitched Leaves Dies (because who doesn't love EVERYTHING stitched?!).

I used a resist embossing technique on my background along with a stencil of winter trees from the Basic Pattern Decorative Masks pack.  These stencils can be used with embossing paste, sponge daubers, or ink pads, but I decided to rub a Versamark pad over the stencil and heat emboss the trees in white on some watercolour paper.  I then watercoloured a mix of inks over top to make my fall background....a combination of Crushed Curry, Cajun Craze, and Crumb Cake.  The heat embossing resists the water/ink, so that the trees seem to pop right off the page.

I absolutely love stitching on dies, it is a simple way to add a bit of texture and detail.  These dies are pretty unique though, as the stitching is a separate die....so you can choose to add the detailing or not.  Also, the outline dies leave stitching on the negative piece, so you end up with a cut away leaf opening and stitches around it. 
There are so many great plaid designs in this paper pack and I can't wait to use them all.  One side of the paper is more Christmasy colours, and the other side is plaid suitable for fall or other times of the year (there is a great magenta piece!).  I layered a piece of neutral plaid behind my watercoloured piece, and then die cut two leaves out of other matching prints for my focal point.  
I added a stitched circle sentiment and lots of gemstones, as well as a tied linen thread bow as embellishments.

I kept the inside of my card blank for now but added a strip of the matching background DSP across the bottom.  I'll add an appropriate message inside before sending the card to a recipient in the future.

That's it for me folks, thanks for stopping by!  Please leave me a comment below before hopping on to the rest of the pages:


Wednesday, 15 July 2020

Watercolour Technique (Blog Hop)

It's Christmas in July everywhere you look these days, so I was inspired to add a twist to our blog theme this month!  Our focus this month is on techniques and I had to use my very favourite technique--watercolouring--on this Christmas card.


I repurposed my Good Morning Magnolia stamp into a poinsettia!  

I heat embossed the flower image in gold and then used several ink colours to add depth and dimension.  This really is the EASIEST way to watercolour.  The heat embossing keeps the water and ink contained so you never colour outside the lines!


I layered the coloured and die cut image on a Forever Gold Laser Cut frame (with a rectangle of white cardstock behind to help it pop), and put it all on a card base of Shaded Spruce.  


Some added gems helped anchor my sentiment as well as provide the sparkle every Christmas card needs.


I kept the inside of my card simple with some more gold embossing.


For some added fun I decided to watercolour a matching envelope!  I used my (retired) Envelope Punch Board to create the envelope out of watercolour paper, and repeated the gold embossing and colouring on the front and back.


I think this will make a wonderful holiday surprise for someone when it really is Christmas. ;)

Please continue hopping along to see all the other wonderful techniques showcased this month:


Monday, 15 June 2020

Blossoms in the Garden (Blog Hop)

So many great new products in the new catalogue, where to begin?!  Our theme this month should have been easy--anything new--but it's so hard to choose!

I ended up going with one of my favourites samples featuring the Forever Greenery suite.  And I had to pair it with a new technique to me, a pleated fold!


I used a new Just Jade card base and embossed just the bottom of the card with one of the new Greenery Embossing Folders. 


 I used some DSP from the Suite for the pleated feature, and the sentiment is from the Grace's Garden stamp set.  I love how Stampin' Up's products work so well with each other!


This card is my favourite because it features something else brand new to me--I made my own felt embellishments!  I adhered some off-white felt to scrap cardstock pieces using regular adhesive tape, and then ran it through my big shot with the Forever Flourishing Dies.  I am going to be doing this SOOOO much now!


I hope you enjoy the rest of the hop, follow these links to see what every one else is featuring today!


Friday, 15 May 2020

Father's Day Blog Hop

Hello Everyone, I hope you are safe and well and riding out this physical distancing as best as you can.  It is certainly wearing thin these days and I know we are all anxious for life to get back to normal.

Our blog hop theme this month is Father's Day and I have two different designs:  one is super simple and the other super complicated!  I like them both for different reasons, and I couldn't decide which one to feature, so I thought I might as well share both!
Let's start with the easy one.  I created this design for some encouragement cards we donated to our local hospital and liked it so much I added some elements for Father's Day.  I think the simplicity of the Ombre design works well for a masculine card and it could be personalized with any colour combination to match the recipient's favourite colour.


I used the wavy border die from the Seasonal Layers die set (retiring next month!) and cut a scalloped edge from three shades of blue cardstock (Night of Navy, Blueberry Bushel, and Balmy Blue).  I gently curled the edge with my bone folder and attached the pieces to each other with approximately 1.25" of each colour showing.  The secret to this design is to only apply minimal adhesive across the TOP of the piece, so that the scallop has a chance to lift up for dimension.

To step it up a notch I also die cut "happy" from the Well Written dies 5 times:  once in each shade of blue and four times in thick whisper white.  This created an eclipse-look while on the surface, but the white underlay helps the letters stand out better.


I also stamped the sentiment "Father's Day" in an Ombre effect, by stamping originally in Balmy Blue, and then sponging the other two colours on top of my stamp before putting to paper.  (This stamp set is from a Paper Pumpkin kit several years ago....I love Paper Pumpkin for this reason!  It really helps build up your supply of great sentiments fast).


I wrapped some linen thread around the top quarter of my Ombre cardstock before gluing it onto my thick whisper white card base.


And now onto the complicated card!  This one was tough from a measuring standpoint, but I had a TON of fun decorating it.  This is an "impossible card" fancy fold--how have I not heard about this until now?!?


Believe it or not the base of this card is created from one 4.25" x 5.5", without glue!  It's just scoring, folding and cutting, and the folding helps create a natural pop-up of the centre piece.


Please check out Dawn Griffith's tutorial for all the measurements---the base is actual quite simple, but I have to say I struggled with the decorative layers!  I'm blaming my ruler....it can't be straight. :)

The key paper is from the Bird Ballad DSP and I thought it paired perfectly with the car imagery from the Geared Up Garage stamp set.  I stamped the car image from the set in the bottom right corner of my centre panel and stamped the sentiments in Old Olive on both Grey Granite and white cardstock and cut them out with the coordinating dies.


I also cut a BUNCH of gears from the die set and heat embossed them with gold, silver and copper embossing powder.  It think it really amps up the realism factor and adds some shine, which I always find hard on masculine cards.  Why don't the men in my life like glitter as much as I do?


Everything is layered and I added some dimensionals in a few places for added dimension.

My dad is always trying to figure out how stuff works and I can't wait to see him try to figure out how this card was made!  He'll likely have it solved within two minutes.

Please hop along to see the creations of my talented teammates:


Wednesday, 15 April 2020

Grandma's Love (Blog Hop)

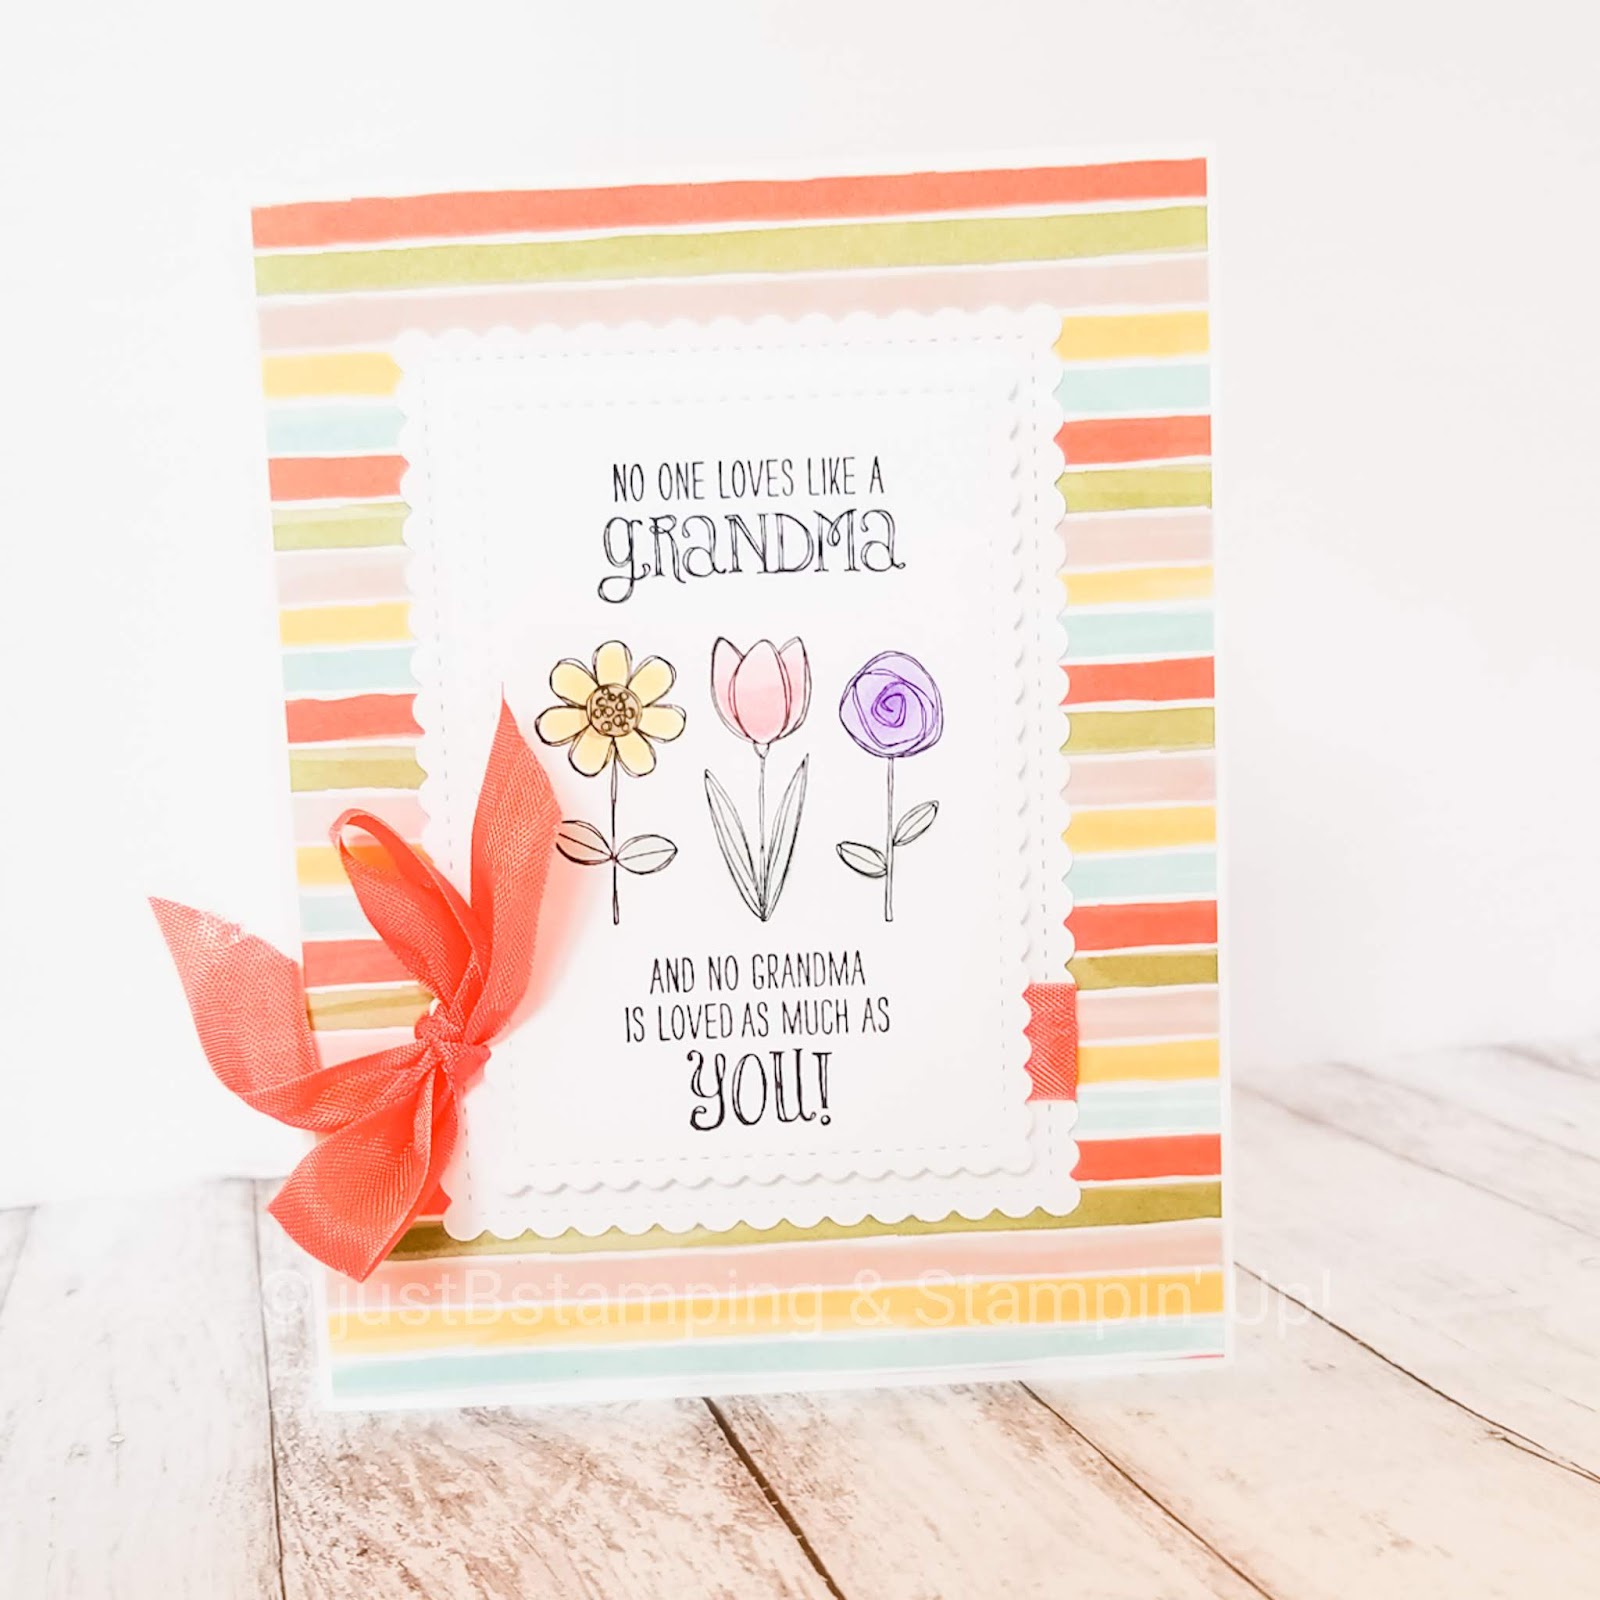
Our theme for this month's blog hop was Mother's Day and I knew right away which set I wanted to use--Grandma's House.  Especially right now, where littles everywhere are missing the hugs and kisses of their grandparents!


I have been spending my social distancing time watching TONS of technique and fancy fold videos on YouTube.  I have so many great ideas for future classes!!  I couldn't wait to try this Inside Shadow Box card I saw Jennifer McGuire make and knew the images from the Grandma's House stamp set would be perfect.

I used a piece of striped paper from the Bird Balled DSP that had such fun colours for Spring as my jumping off point.  I stamped and coloured the flowers using Blends and perfectly lined up my sentiment using my Stamparatus.  I used the Stitched So Sweetly scalloped rectangles to cut out both my stamped piece and a slightly larger layering piece.


I wrapped a bit of pretty Calypso Coral seam binding ribbon (retired, but you can make your own by colouring the white seam binding with Blends markers) into a bow and adhered to the back on the larger stitched rectangle before layering.


The real surprise is on the inside!  This is where the 3D scene magically forms thanks to some easy but clever scoring.  And the best part is it folds completely flat and is able to fit in a standard envelope for mailing!

Here is how it looks as you start to open the card and the shadow box starts forming...


And here is a view from the top-down, where you can see how the shadow box is completely formed.


I sponged the background with a cloud stencil and Pool Party ink, and then sponged a Granny Apple Green hill and layered it on the bottom. I cut out a stitched rectangle so that you can see through to the back panel, and layered some clouds, trees, and a house from the stamp set that I coloured with Blends and fussy cut.


I love that this design could be used for any occasion--I'm going to do some birthday balloons next!

On the inside I also stamped "Thank goodness for Grandma", because seriously...thank goodness for Grandmas!

I encourage you to try out this card for yourself--it is very easy and has incredible wow factor!


Be sure to hop along and see what everyone else has for you today.

Take care and stay safe!

Barb


JustBStamping (Barb--you're here!)


Sunday, 5 April 2020

Wishing You Brighter Days Ahead

I hope you are all safe and well.

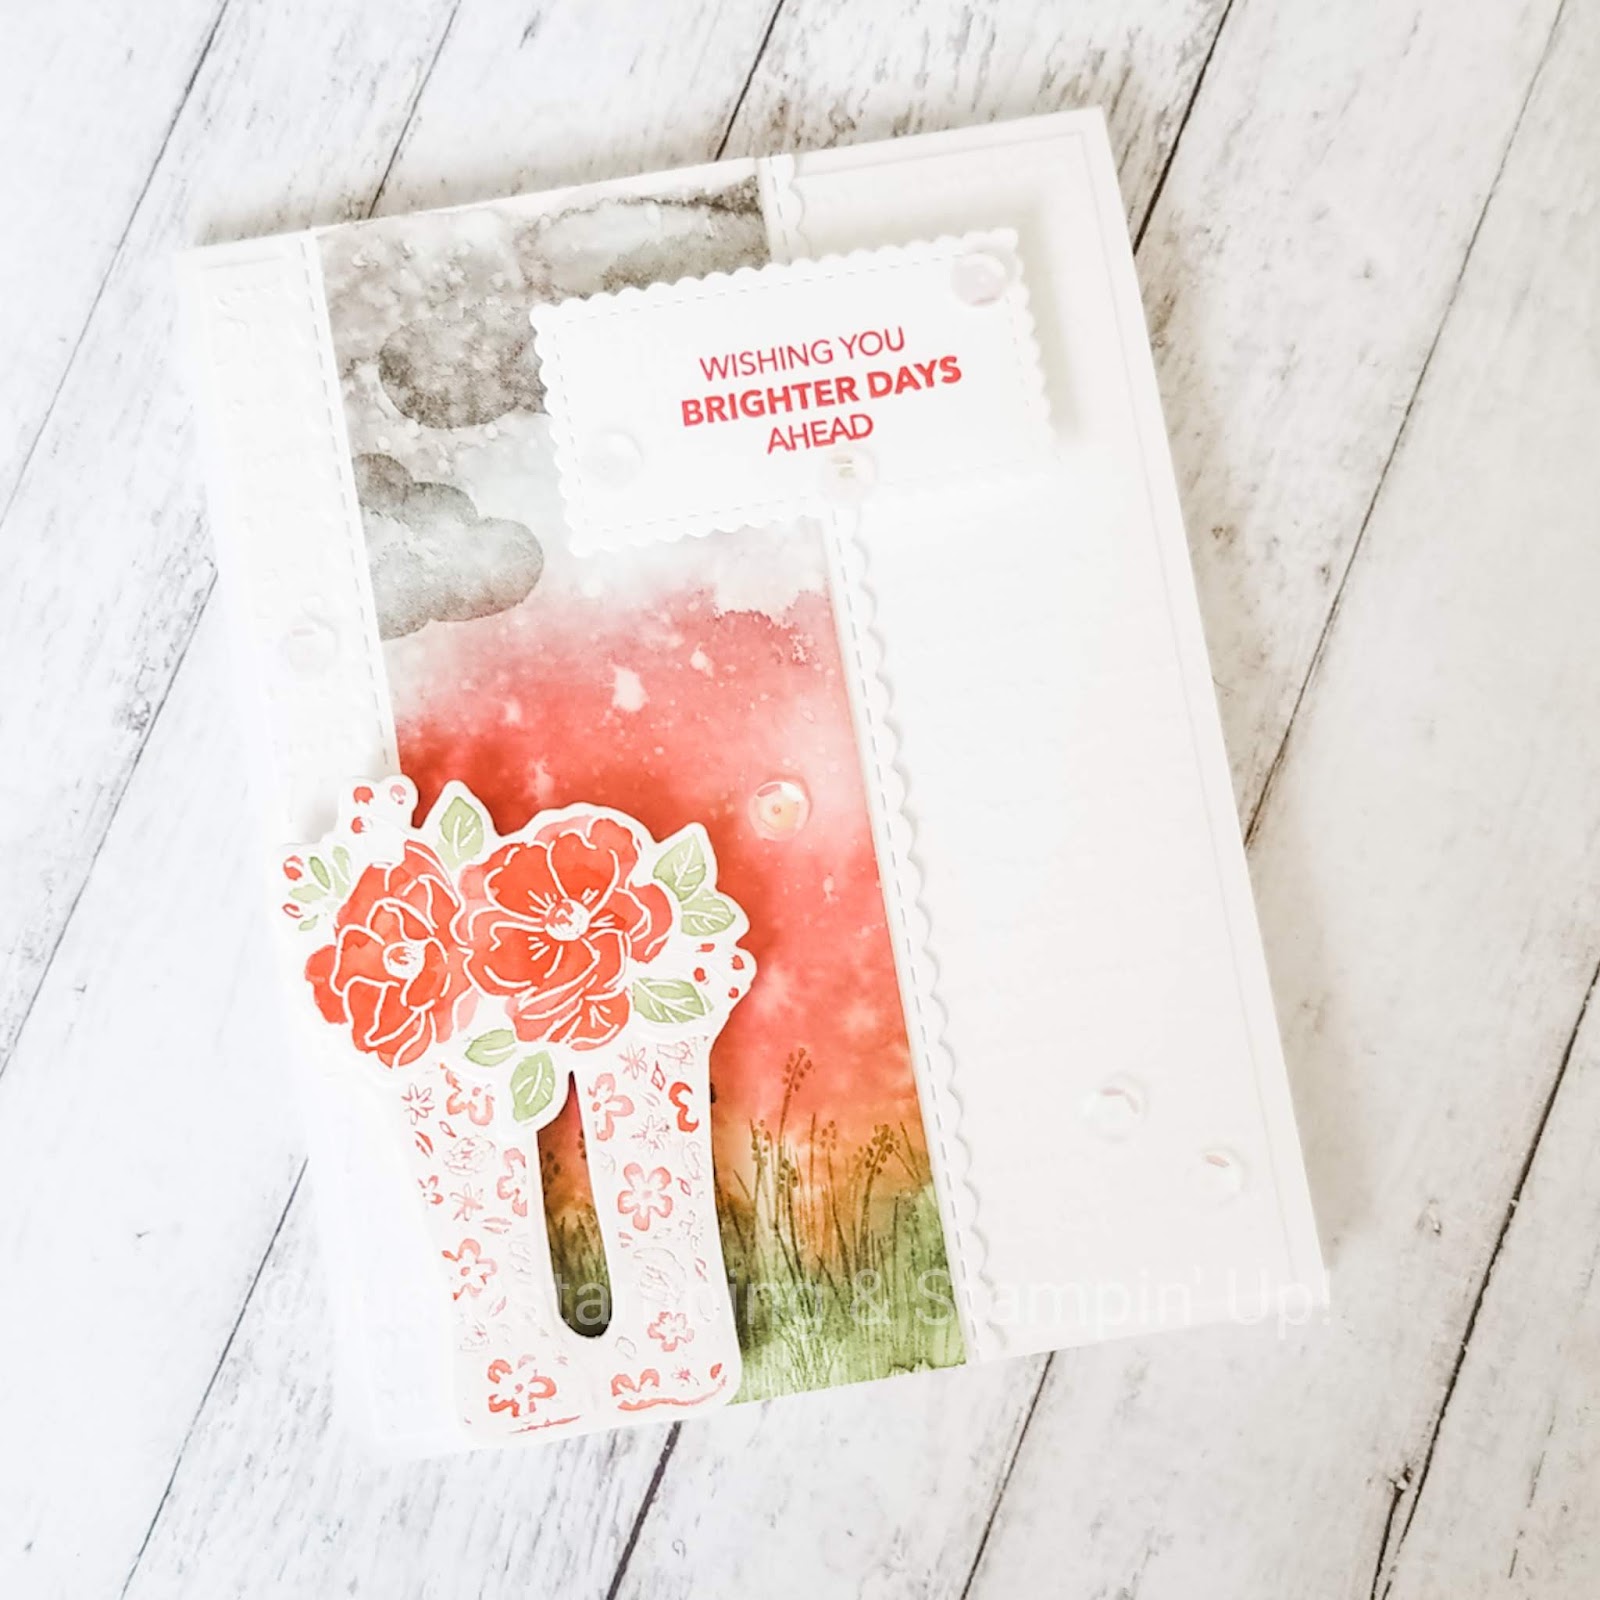
This month's paper pumpkin kit could not have included more appropriate sentiments for the current world situation.  I've been doing craft-therapy this weekend, escaping from the news and learning a new watercolouring technique I am excited to share with you.


I LOVE watercolouring and was interested to find this new, simple, and fast method using markers!  The markers of course need to be water-based for the technique to work, but it is super simple and I was able to get backgrounds for 7 different cards in just minutes.  They are all different, and I've included a pic of each at the end of this post, but they are all based on the same techniques outlined here.

To make the background I scribbled (and I mean, scribbled, there was nothing pretty about it!) some ink with my Gray Granite, Poppy Parade, Pear Pizzazz and Granny Apple Green markers onto watercolour paper.  Then I took my aquapainter and applied a LOT of water over each section, making sure the colouring lines disappeared and gently blending the colours together.  Then I sprayed the whole thing with more water and set it aside to dry.  You could also hit it with your heat gun but I found I liked the look of the natural drying better.

While my backgrounds were drying I white embossed two sets of rain boots from the Paper Pumpkin kit, and one set of flowers from the Saleabration Happy Birthday (retired) set.  I coloured each set to match the background using my ink pads and aquapainter.  I fussy cut the boots and used the coordinating die for the flowers, fussy cutting it into two pieces easily.  The second set I used on the inside of my card, here is a close up of that set.


When my background was completely dry I used the paper pumpkin set to stamp clouds (Gray Granite) and grass (Granny Apple Green) onto the panel.  I love how it gives that washed-out background some definition.


I used a thick Whisper White card base and then added a white panel that was dry embossed with the Scripty 3D Embossing Folder on top (hard to photograph but in real life it gives the card tons of texture).  I framed both sides of a strip of the watercolour background with a stitched scallop edge from the Stitched Be Mine die set.  I popped up my matching watercoloured boots and flowers on dimensionals and heat embossed my sentiment in white on a layered strip of Poppy Parade cardstock.

I challenge you all to make and send some cards this week.  We can all use some happy mail these days!  

As promised, here are the other cards I made, all different layouts and different colour combinations.  If you have eagle eyes you'll notice that I added some clear sequins to some of the designs as well.


Stay safe and well, and share the love--it's more important now than ever!

Barb